Guides!
Simplemining OS guides - https://simplemining.net/
How to bios mod NAVI
Motherboards
Asus B250 Mining Expert bios settings
Bios mod AMD 5700/5700XT under Simplemining
For this guide we are using WinSCP and Red Bios Editor
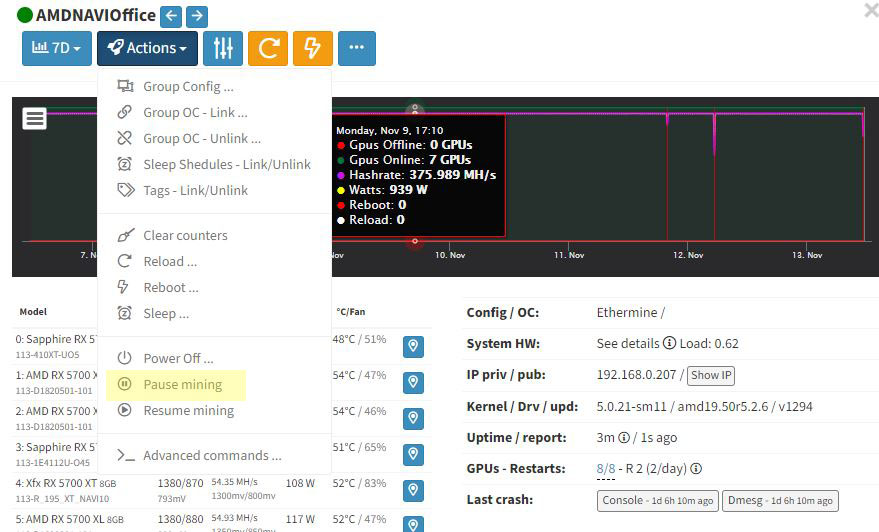
1: Pause the mining from Action menu:
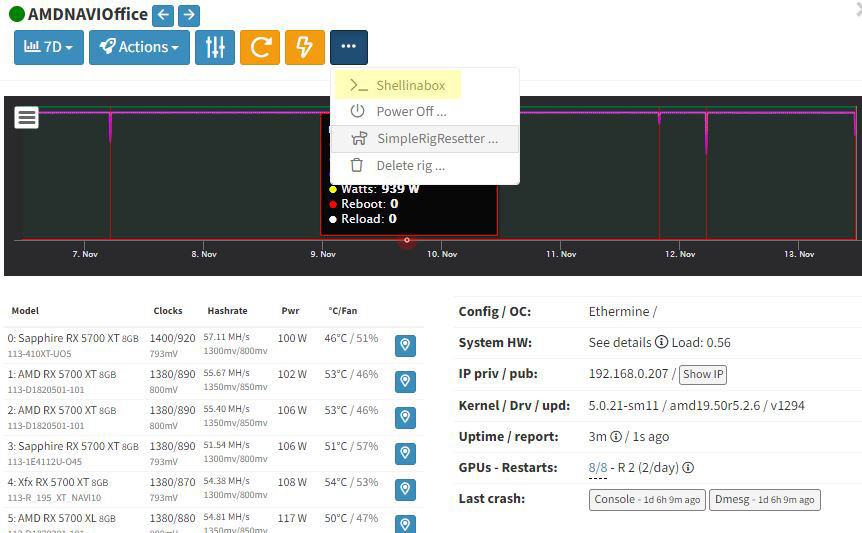
2: Go to ... and >_ Shellinbox
3: Let it log in, and run the command for saving the bios. We are saving the bios from gpu3.
sudo /root/utils/amdvbflash -s 3 stockbios.mod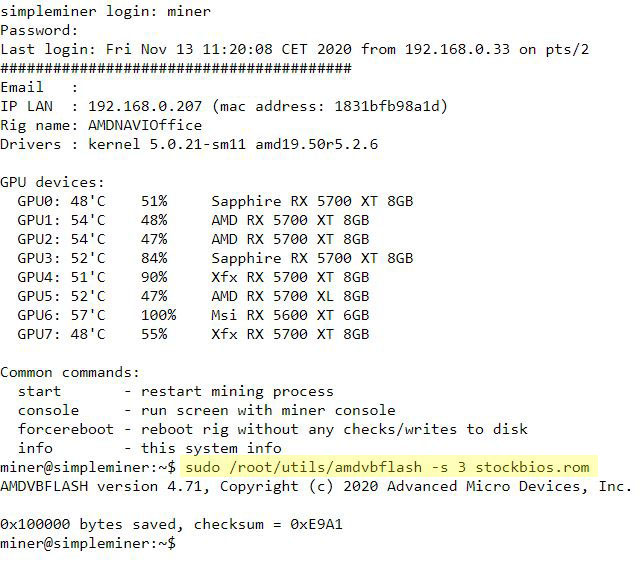
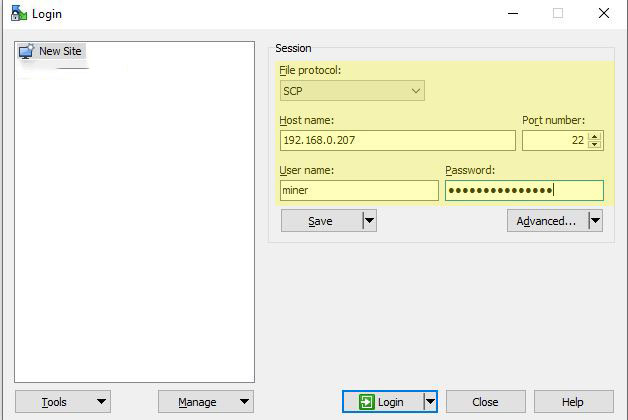
4: Now open up WinSCP and log into the rig. We will now copy the stockbios.rom to your Windows computer.
File protocol: SCP, Hostname: IP you can find from Info on the rig (see example in first screenshot). User name: miner - Password: your email
5: Copy the stockbios.rom over to your computer.

6: Open up Red Bios Editor, and open stockbios.rom.

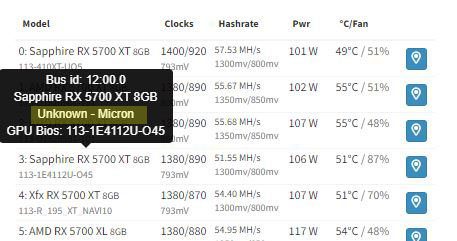
7: Remember to check if your gpu has Micron (MT61K256M3) or Samsung (K4Z80325BC) memory. This can be done in gpu list:
8: Go to VRAM Timings.
For Micron we copy this memory timings for 1750 and up:
400A0000150A000000000000EA0900004003000017291D1444001B000606000214000000050A0A001E000000319306000000010101000101001F1800F91500000A0A0000D7000000D70000008A208402560000000A00040A160300011F2A0C00B4000000C2F4130FB400000000000000For Samsung we copy this memory timings for 1500/1550 and up:
000000001F080000000000000A09000040030000183219104A0018000606000218000000070909001C000000218F07000000010101000101001E1800B81A000012120000D2000000D200000052518A02640000000C000A12170500011F2A0C00C6000000CBF5130FC600000000000000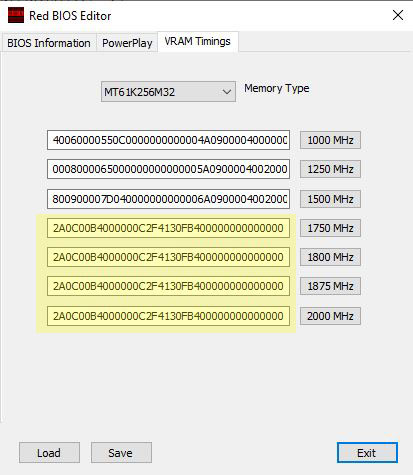
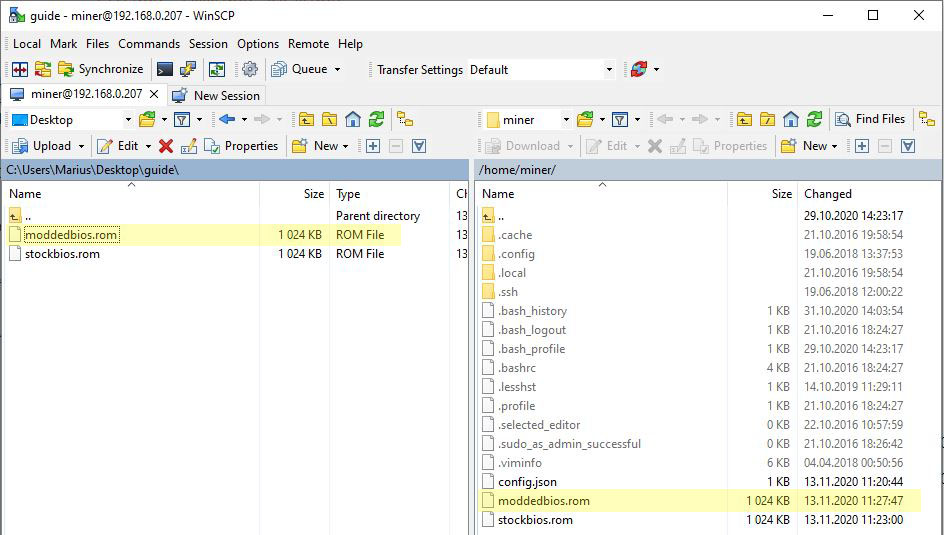
9: Click save, and then copy the moddedbios.rom back to you rig with WinSCP:
10: Now its time to write the bios to the GPU. We are writing it back to gpu3
sudo /root/utils/amdvbflash -p 3 moddedbios.mod
11: Reboot the rig:
sudo reboot and you are done!

12: Remember to resume mining:
